Showing posts with label Technique. Show all posts

Wednesday, November 6, 2013

The Goose is Getting Fat...

Oh Christmas. It's going to be a new adventure for the Hub and I. No young 'uns at home to make us decorate... or even better, to decorate for us. DS1 used to do it for us in the old days. Maybe he'll do it for us this year now that he's moved back to the hometown.

With the girl child off preaching the gospel in "foreign" lands (California... it's like foreign, but with domestic shipping rates) I know how important the holiday season will be for her to feel support from home. She starts with her birthday, then skips right into Thanksgiving (she was born on Thanksgiving Day) then jumps on to Christmas. I'mjust getting started with holiday sewing. Here is my first free motion quilting project ever:
 
See the tutorial from Missouri Quilt Co HERE. I love YouTube... love it ...love it...LOVE IT!!
If you are a coward like me and don't feel confident free-handing a stocking, THIS is the template I used. It's a downloadable PDF and part of a nice text tutorial at fabricworm.blogspot.com.  

Thursday, January 10, 2013

Hello - One Sheet Wonder

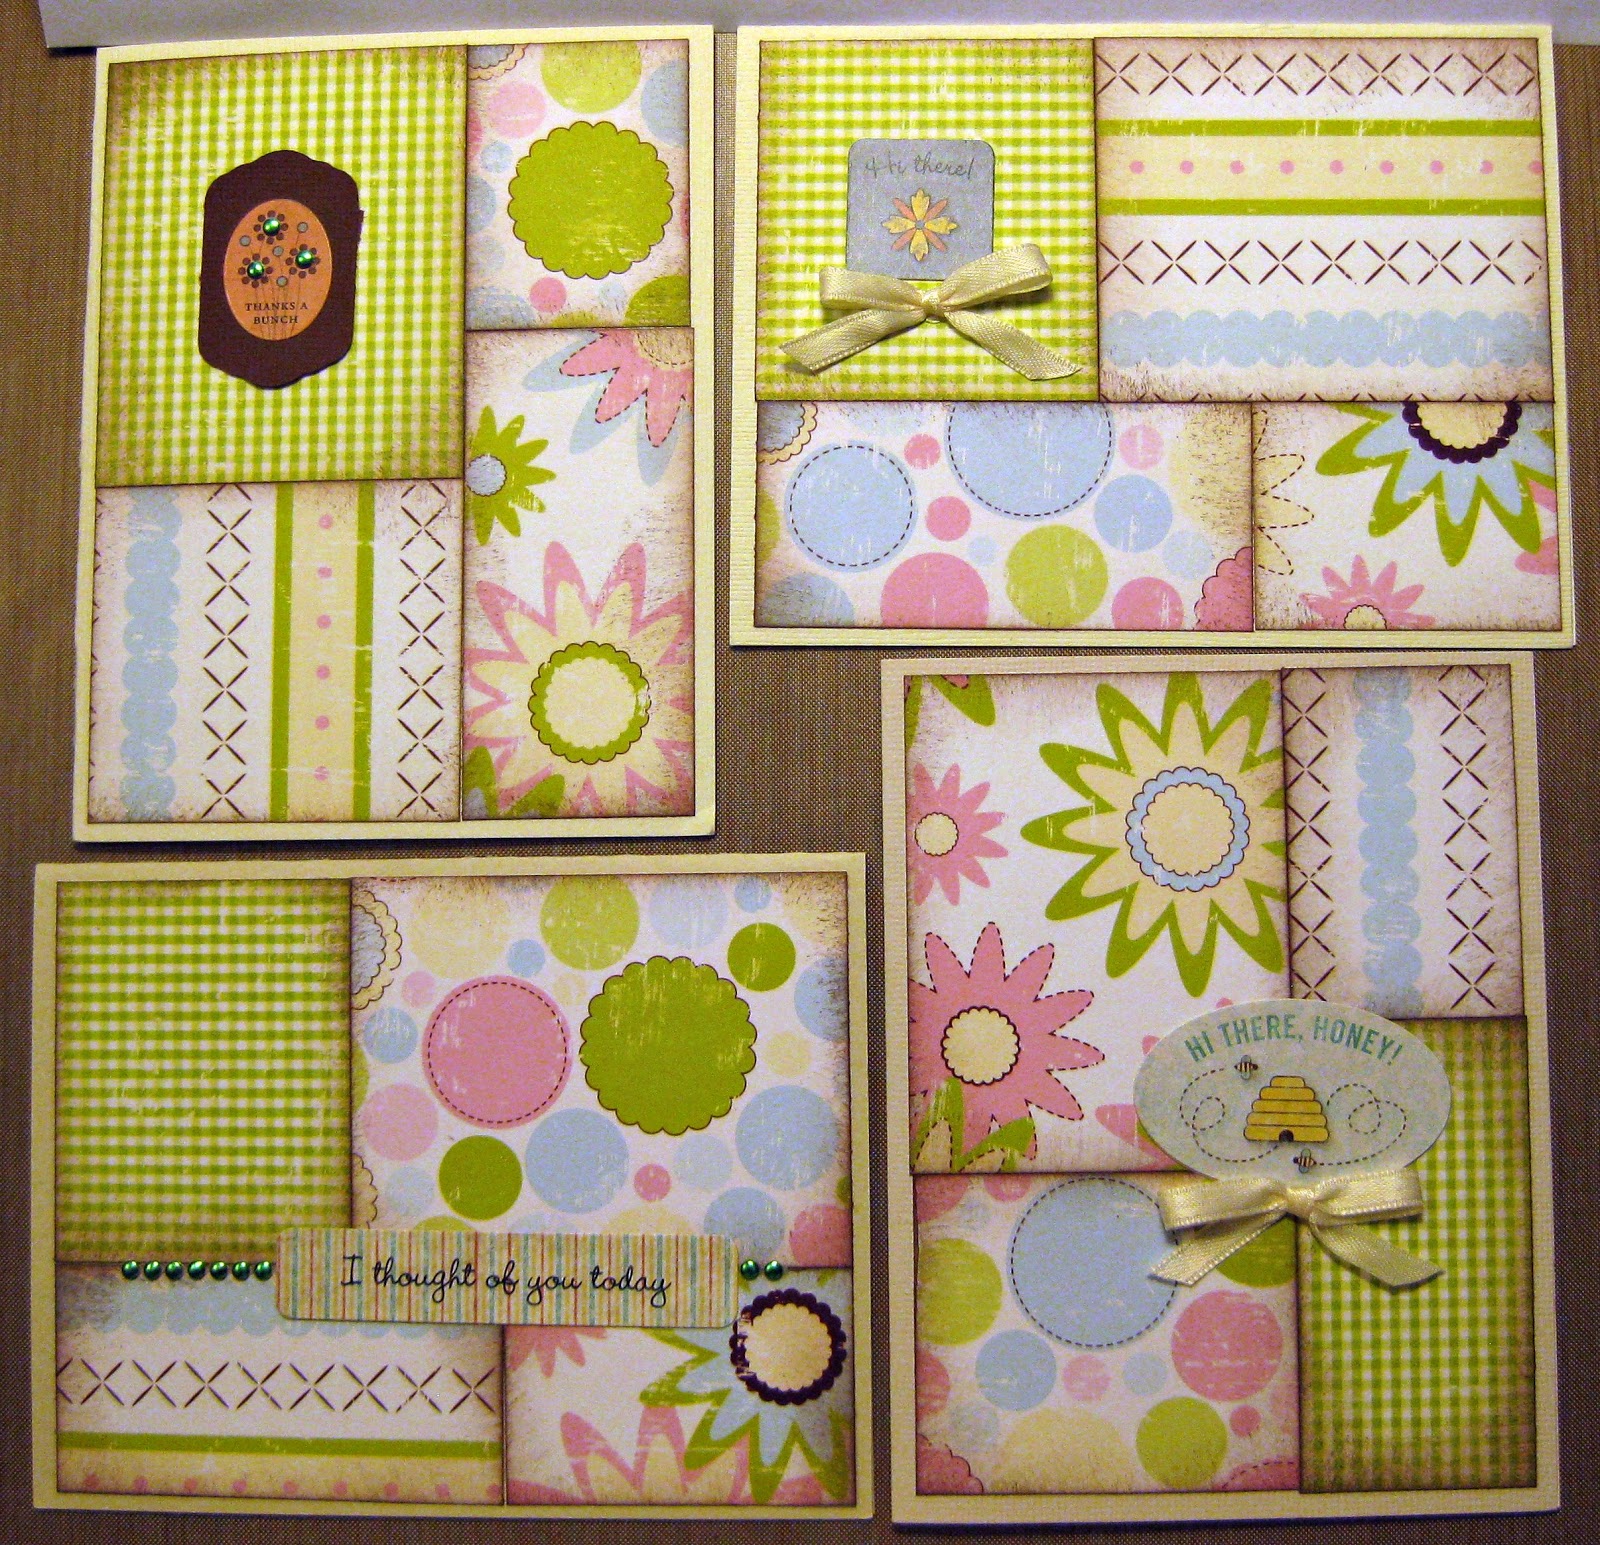
One Sheet Wonder. The principle is simple enough: slice up a single sheet of patterned paper into various sizes and make a stack of unique cards, each with only one or two bits of the PP. Many OSWs  leave no waste of the PP, most leave just tiny bits. It's a great way to create a set of cards that are matchy but not samey. This OSW uses an 8x8 sheet. The cutting guide and samples can be found at Joyfully Made Designs.


Now the down side...

While the OSW is an economical use of patterned paper, it requires matting and embellishing with coordinating paper. That is to say, the entire sheet of Patterned paper may be used to its most economical advantage but you'll need to chop up several additional sheets of coordinating cardstock which will not  be used to advantage. I keep a box of large scraps for just this purpose but the deception of the name, One Sheet Wonder, still bothers me.

Several bloggers have found their own very useful solutions to this problem. Sandy at OWH cuts her full sized sheets down to card sized bits so she only ever handles papers 4.25x5.5 inches.  After she makes the card, she tosses the trimmings, no messy leftovers. I'm always afraid I'll want an additional 1/4 inch stripe and have to cut a whole paper to get it. Connie at Simply Simple Stampin' has a series called Flash Cards. The premise is you cut your papers into basic sized swatches and use only those 3 bits for your cards. I was skeptical. Being an inside the box thinker, I was sure you could only make two cards with the sizes she gives. She has created an entire series of terrific (ie: reproducible) cards using 3 little bits of paper each. Pretty. Darn. Amazing. Her videos are on YouTube as well as her blog. Seriously, check it out. She is a fabulous designer and a great teacher. LeeAnn at Flowerbug's Inkspot has created something more like what I'm interested in. She calls it a Four Sheet Wonder. Her pattern includes instructions to cut the patterned paper as well as the mats and embellishments for 9 cards using 4 sheets of paper. Plus, the patterns are printable onto your cardstock. That means no measuring, just print and cut on the dotted lines. Pretty cool, but there is a charge for the pattern and unfortunately my budget only allows for FREE.

So what to do? I'm just going to have to invent my own solution to the One Sheet Conundrum. I don't know how this is going to go down but it will be awesome.I'll keep you posted on the progress.

Wednesday, December 5, 2012

WMD - 24 Quick Cards

I got this great idea on Pinterest. It was originally posted on SIMPLY SIMPLE STAMPING with Connie Stewart under the Big Shot tab. You have to scroll down the page quite a way. Connie has a seriously awesome blog. She is a Stampin' Up demonstrator so she posts really clever and lovely crafts; even a pie crust recipe. I went there to get the link for the cards and got lost for an hour. I pinned four or five things before I decided just to pin the whole blog.
In one evening I made 24 card faces from four 12x12 sheets of coordinating card stock. If you use double sided you can get 12 cards from two sheets. (You end up with one 1.5x12 inch strip left over from each sheet from which I'll make adorable Spring rosettes.) Use 8.5x11 and get 16 cards from 4 sheets with no waste. You get the idea. A greeting and a drop of bling or a snip of ribbon and you are good to go. Another go-to pattern for using scraps or making quantities in a jiffy.

Wednesday, November 21, 2012

All About Me

These are the remnants of the Perfect Pages All About Me kit. There is a tutorial for the pinwheel element over at OWH, but I cheated and used 2 inch striped paper rather than making my own strips. I recommend looking at the tut however. Here is what happens when you follow her instructions: Pretty cool.

Saturday, November 17, 2012

Rosette Turkeys


Here is my little turkey flock, ready to adorn the Thanksgiving table. I'm not much of a cook so this is my contribution to the celebration. They are based on the Tim Holtz Quirky Turkeys but I used the MS scoring board rather than a die.

I made the bodies/faces from basic shapes on MTC (2 circles and an elongated tear, welded and stretched to 2.25 inches tall for the body, a kite for the beak and half a yin/yang for the waddle.) But if you don't want to make your own, Cricut has several choices or there are some freebies on the web.

Here are cutting measurements to get three turkeys per 12x12 sheet:
Cut paper vertically at 10.25. This will give you a strip to punch circles for stability. Contrary to what Tim says I put one on the front and back of each rosette. It made them easier to glue together.
Cut 3 strips 1.5x10.25
Cut 3 strips 1.25 x 9.75
Cut 3 strips 1x9.25
Punch along one long edge of each of these 9 strips with your scallop edger, score at quarter inches, then follow Tim's instructions.

The rosette paper is from SEI's Nutmeg stack.


Wednesday, November 14, 2012

WMD - Let's go fly a Kite

More cards from scraps! Hooray! The sketch for these fun Kites once again comes from the OWH Using Scrap Tutorial.


All you need to make a kite is: dark cardstock at least 4.5x6.5 (I ran out of black scraps and started using pages from a Matstack. It was a perfect fit, no margin for error.) and two coordinating scraps about 1 3/4x4. If they are a little wider they can be a little shorter, and if they are a little narrower you can make your kites a bit smaller. I made one change in the assembly: I glued the top corner then cut it off and brought the scrap down to the bottom corner. That probably won't make any sense until you watch Sandy's video and make your own kite. The kite tut is at the very end of the very informative and inspiring scrap wrangling video.

Saturday, November 10, 2012

Life is too short to craft with ugly paper

The tutorial for these cool Starburst cards is on the OWH website. Fun, easy and nice to have something different. And as a special bonus the Starburst card is the I Spy Sketch this week. I'm going to post mine for reals this time.

As I was fussing with the remnants of the "Love" Perfect Pages kit I remembered struggling to find a way to make it make me happy when I used it on calendars. All I have left is the solid pink and tan paper that don't match any of the embellishments, which is why I didn't use them in the first place. But I wanted to try the Starburst so I saw this as an opportunity for experimental crafting; if I failed I wasn't out much. As I was finishing up these cards the voice of reason came to me and said, "Let's go watch Vampire Diaries." That Girl Child knows just what to say to lead me astray. So I tossed the ugly paper and most of the embellishments that came with it. I'll do more starburst cards another time with paper I love.

Inspiration

I managed to get 9 cards from the remains of the Colorbok Perfect pages kit, Inspiration. (One got lost in the bits pile and I didn't find it until after the photo was taken. Sorry, no make-up day for blog pix.) I don't use much purple but it is the Hub's favorite color and I liked the combo with the green.
These three sketches, Pinwheel, Smalls and Gift boxes, were from Sandy's OWH scrap wrangling tutorial aptly named: Using Scraps. Sandy has great ideas, complete with suggested measurements, about keeping card making bits from taking over your world. GO! Watch! DO!
 
Next kit remains to tackle: LOVE...just in time for Valentines Day. Don't forget the All Things Spring box ships in six weeks.

Thursday, November 1, 2012

Reverse Nestablilites

Have you met Gina K. at GinaK Designs/ StampTV? No? Well now's your chance. As I've cruised YouTube, astonished at the amazing things people do with paper, Gina's videos keep popping up. She makes beautiful cards and makes it look so easy. For example, in  this video she demonstrates a technique she calls Reverse Nestabilities. Turns out I don't own any Nestabilities, but I do own Make-the-Cut. So I just used similar shapes to create a cut file for the same effect.
The card on the left is the Reverse Nestabilities technique. If you look closely you can see that the whole card front is popped up so only the bottom layer of the butterfly and the sentiment are actually on the card. Pretty cool. The card on the right uses the leftover cutouts. Easy, clever and I got 8 cards from 3 sheets of paper, butterflies included.

Credit where credit is due: Paper and Ribbon is American Crafts. Stamps are Fiskars. Butterfly svg is SVGcuts.com from the Cheryl's cute bugs collection.

Thursday, October 18, 2012

Card game #3 - Tutorials worth reading

This tutorial  on the Greeting Farm is a great one for photographing cards. Lesson one is Learn Your Camera. I've tried to read my camera's manual several times but got bogged down in the techno babble. Jen has broken down the things you need to know so you are not trying to remember EVERYTHING.

Now, if I were a camera manual where would I be?...

And Here is another fabulous tutorial on how to use up an entire 6x6 paper pad to make cards. It's pretty cool and the theory can be adapted for any set of papers you are working with. I don't know where the original post is but it's reposted on OWH. The basic idea is that you find a sketch you like and make as many cards as you want. Then you find a sketch that uses the size of scraps you have left over and make as many of those cards as you can stand. Repeat until everything is used up (or you can't stand to look at the same papers ever again.) The sketches on OWH have dimensions so you can choose your sketch according to what you have. I think it's brilliant. Thanks Kristy.

So here is the card game: grab a couple of coordinating scraps, find a sketch that requires pieces that size and try Kristy's use it 'til its gone principle. You don't even have to use a sketch if you don't want. Just use up a bundle of scraps.

I'll post what I come up with...as soon as I can find my desk. (It's currently buried in a CTMH workshop I haven't finished.)

Sunday, September 9, 2012

Rotate Picture!

I learned to rotate a picture in Blogger! Thanks to this helpful post  http://www.linesacross.com/2011/08/how-to-rotate-pictures-in-blogger.html and I linked it! GO ME! This whole blog thing thought it could get the better of me. But, here I am blogging, rotating and linking.You just wait...someday, someone is actually going to VISIT my silly slime spot.

Thursday, August 16, 2012

WMD - Where's my desk?

You probably thought I forgot about Where's My Desk Wednesday. Nope. My computer was just ill yesterday. But I turned it over to the loving care of Dr. Hub and he fixed it. Well, he put it in a splint for now and ordered a new power cord. Thanks Dr. Hub! You truly are the amazing Mr. Fixer Man!

So here is my desk. I'm trying out a "sketch" found on Pinterest originally published by Jill Rancourt in 2011 at TheScrapoholic.blogspot.com. Which blog is, btw, chock FULL of sketches, svgs and other fun stuff. I'll be adding her to my web hangout list. Jill calls these "5pc emboss cards". Two sheets of solid colored cardstock and an embossing folder makes 6 cards, three of each style, with almost no waste. Easy, fun and 6 more cards to add to my OWH box. I'll be making these again and again.


I love the paper lace on the blue cards. I've had this piece in my box of orphaned embellishments for a while. I didn't want to use it because it is all I had and it was so pretty. Imagine my delight while rummaging stamps to discover I actually own this set! It is called Lovely Lace from CTMH.