Soooo... The All Things Spring OWH box did not go in the mail as scheduled. My Bad!
The new target date is Jan 31. The great news is that Valentines Day will come again next year. So if you have Valentines Cards to include in the box feel free to bring them over. They'll keep. The new deadline will include St. Patty's, Easter, General Spring, Graduation, Mother's/Father's Day, and as always anything generic like Love, Miss you, Thinking of you, Thanks you, and Birthday.
I'll even take Summer/Fall cards to include in the box scheduled to ship in May.
Showing posts with label OWH. Show all posts
Showing posts with label OWH. Show all posts
Friday, January 4, 2013
Monday, December 24, 2012
Happy Holiday Season!
You know that phrase "I try to take one day at a time, but lately several have ganged up on me at once." That's how I've been feeling. Christmas shopping started late this year. It's a white Christmas Eve and I haven't made a list and checked it twice to see if I'm done shopping. I hope so because Susy Snowflake is tap tap tappin at the window pane and I'm not sure I'll get out today. I'm just on the computer because I'm waiting for my Cricut to finish cutting the last of my tags so I can get the gift wrapping under control.
Don't forget the All Things Spring box of cards will ship to Operation Write Home on Dec 31. I need your cards by Dec 29 so I can get them Tucked Stamped Sorted and Packed for shipping.
Merry Christmas Everyone! May Santa bring those craft supplies you asked for and may your Holiday Season be safe, warm and wonderful. Big Holiday Hugs to you and yours.
Thursday, December 13, 2012
Hogs and Kisses

Wednesday, December 5, 2012
WMD - 24 Quick Cards
I got this great idea on Pinterest. It was originally posted on SIMPLY SIMPLE STAMPING with Connie Stewart under the Big Shot tab. You have to scroll down the page quite a way. Connie has a seriously awesome blog. She is a Stampin' Up demonstrator so she posts really clever and lovely crafts; even a pie crust recipe. I went there to get the link for the cards and got lost for an hour. I pinned four or five things before I decided just to pin the whole blog.
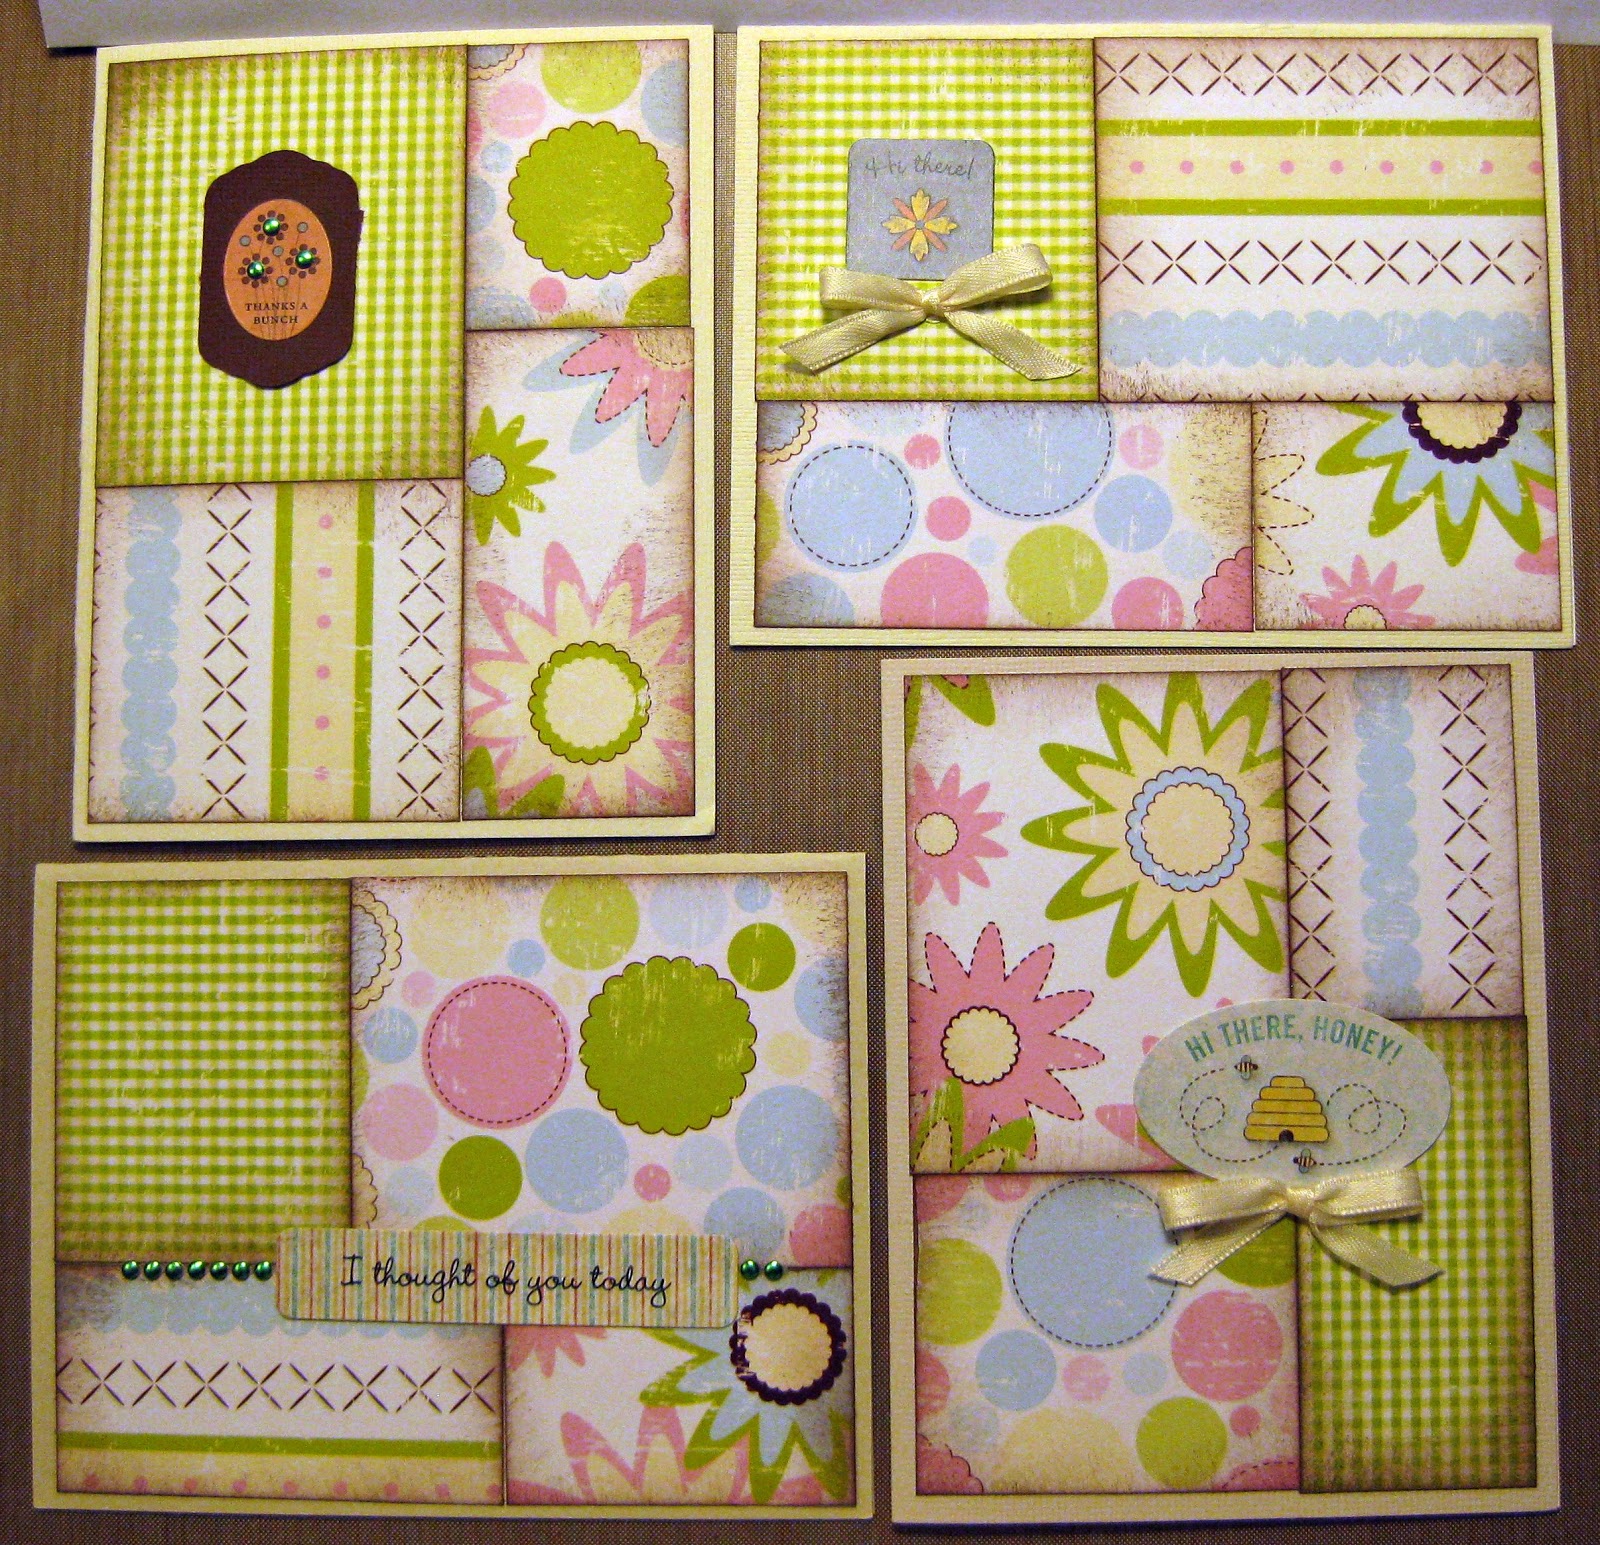
 In one evening I made 24 card faces from four 12x12 sheets of coordinating card stock. If you use double sided you can get 12 cards from two sheets. (You end up with one 1.5x12 inch strip left over from each sheet from which I'll make adorable Spring rosettes.) Use 8.5x11 and get 16 cards from 4 sheets with no waste. You get the idea. A greeting and a drop of bling or a snip of ribbon and you are good to go. Another go-to pattern for using scraps or making quantities in a jiffy.
Wednesday, November 21, 2012
All About Me


Wednesday, November 14, 2012
WMD - Let's go fly a Kite


All you need to make a kite is: dark cardstock at least 4.5x6.5 (I ran out of black scraps and started using pages from a Matstack. It was a perfect fit, no margin for error.) and two coordinating scraps about 1 3/4x4. If they are a little wider they can be a little shorter, and if they are a little narrower you can make your kites a bit smaller. I made one change in the assembly: I glued the top corner then cut it off and brought the scrap down to the bottom corner. That probably won't make any sense until you watch Sandy's video and make your own kite. The kite tut is at the very end of the very informative and inspiring scrap wrangling video.
Saturday, November 10, 2012
Life is too short to craft with ugly paper
The tutorial for these cool Starburst cards is on the OWH website. Fun, easy and nice to have something different. And as a special bonus the Starburst card is the I Spy Sketch this week. I'm going to post mine for reals this time.

As I was fussing with the remnants of the "Love" Perfect Pages kit I remembered struggling to find a way to make it make me happy when I used it on calendars. All I have left is the solid pink and tan paper that don't match any of the embellishments, which is why I didn't use them in the first place. But I wanted to try the Starburst so I saw this as an opportunity for experimental crafting; if I failed I wasn't out much. As I was finishing up these cards the voice of reason came to me and said, "Let's go watch Vampire Diaries." That Girl Child knows just what to say to lead me astray. So I tossed the ugly paper and most of the embellishments that came with it. I'll do more starburst cards another time with paper I love.

Inspiration
I managed to get 9 cards from the remains of the Colorbok Perfect pages kit, Inspiration. (One got lost in the bits pile and I didn't find it until after the photo was taken. Sorry, no make-up day for blog pix.) I don't use much purple but it is the Hub's favorite color and I liked the combo with the green.

 These three sketches, Pinwheel, Smalls and Gift boxes, were from Sandy's OWH scrap wrangling tutorial aptly named: Using Scraps. Sandy has great ideas, complete with suggested measurements, about keeping card making bits from taking over your world. GO! Watch! DO!
Next kit remains to tackle: LOVE...just in time for Valentines Day. Don't forget the All Things Spring box ships in six weeks.


Next kit remains to tackle: LOVE...just in time for Valentines Day. Don't forget the All Things Spring box ships in six weeks.
Thursday, November 1, 2012
Reverse Nestablilites
Have you met Gina K. at GinaK Designs/ StampTV? No? Well now's your chance. As I've cruised YouTube, astonished at the amazing things people do with paper, Gina's videos keep popping up. She makes beautiful cards and makes it look so easy. For example, in this video she demonstrates a technique she calls Reverse Nestabilities. Turns out I don't own any Nestabilities, but I do own Make-the-Cut. So I just used similar shapes to create a cut file for the same effect.
 The card on the left is the Reverse Nestabilities technique. If you look closely you can see that the whole card front is popped up so only the bottom layer of the butterfly and the sentiment are actually on the card. Pretty cool. The card on the right uses the leftover cutouts. Easy, clever and I got 8 cards from 3 sheets of paper, butterflies included.
Credit where credit is due: Paper and Ribbon is American Crafts. Stamps are Fiskars. Butterfly svg is SVGcuts.com from the Cheryl's cute bugs collection.

Monday, October 29, 2012
Lucky to Know You
This is the I Spy Sketch this week. It's simple but they have done some lovely things with it. Check it out HERE .Then grab a bundle of scraps and make a card. Easy! It's a nice sketch to show off your cute paper and a fun element.

I think Leprechauns should have as much gold as possible so I heat embossed the clover for good measure. I'm loving this ribbon for OWH cards. I got it at JoAnn's. It's metallic so it sparkles, but it doesn't flake because it's not glitter. Love it.

I think Leprechauns should have as much gold as possible so I heat embossed the clover for good measure. I'm loving this ribbon for OWH cards. I got it at JoAnn's. It's metallic so it sparkles, but it doesn't flake because it's not glitter. Love it.
Saturday, October 27, 2012
Pemberly Done
I finally got my CTMH Pemberly kit done. It only took 4 months. Sadly that may be a record for me.

I didn't ink any of the cards. I thought the paper was busy enough that it wasn't necessary. I inked the layouts and didn't think it added enough interest to justify the extra effort. What do you think?


Thursday, October 18, 2012
Card game #3 - Tutorials worth reading
This tutorial on the Greeting Farm is a great one for photographing cards. Lesson one is Learn Your Camera. I've tried to read my camera's manual several times but got bogged down in the techno babble. Jen has broken down the things you need to know so you are not trying to remember EVERYTHING.
Now, if I were a camera manual where would I be?...
And Here is another fabulous tutorial on how to use up an entire 6x6 paper pad to make cards. It's pretty cool and the theory can be adapted for any set of papers you are working with. I don't know where the original post is but it's reposted on OWH. The basic idea is that you find a sketch you like and make as many cards as you want. Then you find a sketch that uses the size of scraps you have left over and make as many of those cards as you can stand. Repeat until everything is used up (or you can't stand to look at the same papers ever again.) The sketches on OWH have dimensions so you can choose your sketch according to what you have. I think it's brilliant. Thanks Kristy.
So here is the card game: grab a couple of coordinating scraps, find a sketch that requires pieces that size and try Kristy's use it 'til its gone principle. You don't even have to use a sketch if you don't want. Just use up a bundle of scraps.
I'll post what I come up with...as soon as I can find my desk. (It's currently buried in a CTMH workshop I haven't finished.)
Thursday, October 4, 2012
Lucky Card

WMD - The Bird has Left the Nest

Tonight I'm counting, sorting and bundling. I was surprised to discover that we didn't actually reach the goal of 350 cards. I judged our progress by the filling of the box. We ended up with 289 cards and the box was FULL FULL FULL! I could have fit 11 more in to make an even 300 but there is no way I could have fit 350 as planned, and I'm pretty darn good at puzzles.
Monday, October 1, 2012
It's a brand new Season! SPRING!
It's time to start a new season of Operation Write Home cards. The "Christmas/Winter" box is filled to overflowing which gives us a little head start on the new box. I know it seems a little odd to be setting aside Christmas on the First day of October, but here we go anyway.

This is the first set of cards I've made for the "All Things Spring" box that will be shipping out in December. You can get the SVG for the Doily (posted 9/21/2012) and the Happy Birthday 2U (posted 9/10/2012) at birdscards.com. I welded the circle sentiment inside the doily and multi-layered the mat so the sentiment sits up off the card. Bird has great FREE cut files and digi stamps on her site. And she makes FABULOUS cards. It's worth going to her site just to look at her beautiful work.
My goal is to learn to use digi stamps so I don't have to try to cut sentiments. I got quite frustrated with these. I blame much of it on the off brand cutting mats I used (by Simply Crafty) which have proven disappointing beyond words.
Enjoy this lovely Fall weather...but make cards for Spring.
Wednesday, September 26, 2012
WMD - Cards and More cards

If you have any more cards to add to this shipment, I need them this week. And if you are willing to donate dollars toward shipping that would be appreciated too.
My next box will go out late December with Valentines, St Pat's, Easter and all that is Spring related. We also need Birthday, Thank You, Missing You, Thinking of You, General and Blank cards.
Now I'm off to celebrate the Hub's Birthday. Happy B-Day darlin'. Who loves you most?
Wednesday, September 19, 2012
WMD - Don't Blink
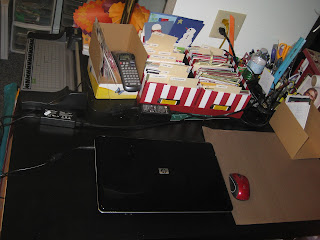
(The Hub just walked in and said "Hey! Your desk is black!" Followed by "Have I ever seen that cutter?" To which I responded, "Not for a while." Truth is it hasn't moved from that spot since the desk was built, it is usually just buried in paper scraps. I don't think he's ever realized it's a cutter.)
Our very first Operation Write Home shipment will happen next week. Our goal was 350 cards. If you have cards to donate make sure I have them by Sept 30. I'm pretty sure we'll make our goal and have some cards that will have to wait until the next shipment scheduled for December. That makes me super happy.

Friday, September 14, 2012
Card game 2.1
How did card game #2 go? Did you
get all scraps into useful little cardmaking bundles? No? me neither.
But I got some of them, mostly plain cardstock. I kept getting
sidetracked by making cards out of the scraps I was supposed to be
bundling. I suppose that's really the goal anyway so it's ok.
Card
game #2.1 goes like this: Go through your little bundles of patterned
paper. Find your most wintery paper (not Christmas) and make a card. You
can add whatever plain cardstock or embellishments you want. The only
rule is to make a winter card from your scraps. Pretty easy rules.

The vertical card on the right was created from this sketch http://ispysketches.blogspot.ca/2012/09/issc32-with-marie-alice.html posted on I Spy Sketches 7 Sept 2012.
Wednesday, September 12, 2012
WMD - Don't try this at home
I missed WMD last week, but I had a very good reason. You see... the girl child made me do it. A friend recommended she watch the previous seasons of Vampire Diaries. That sounds like a show that I could enjoy so I watched it with her. We watched 2 seasons last week. We couldn't help it....we just got SUCKED in!!! Bwahahah! see how I did that? Vampires...sucked in!
Yeah I know...go work on cards.

I'm astonished and a little embarrassed at how often my computer keyboard becomes my crafting workspace. I guess that's because I love svg's but I also like to look at what I'm building after I get the bits cut out. I'm absolutely positive that one day I'm going to be really, REALLY sorry I do this. Once again, another project for another day: make room on my desk for my computer AND my crafts.

I got this adorable free SVG Reindeer from DieCutGirl.blogspot.com posted April 1, 2012. The original doesn't look as angry as mine. It has to do with the placement of the eyebrows. In spite of the reindeer wearing his angry eyes, I think the cards turned out adorable.

Tuesday, September 11, 2012
OWH progress
Hey all you lovely card makers!
I'm just checking in with progress on our OWH box. Our goal was 350 cards by the end of this month as I recall. I have over a hundred fabulous cards sitting on my desk waiting to be "stamp and tucked". I'd love to take credit for making all of them but many of them have been donated. So, thanks everyone for that.
I'd love it if you'd post how many you have ready. And if you want to donate you can bring them to my house or Juleen's house (don't you love how I volunteer her for stuff like that?) and we'll get them in the box. And if you can't donate cards...I'd be happy to accept dollars toward shipping. :-)
The shipping date for these to be in Washington to be sorted and mailed overseas is early October. So I thought it might be fun to have a stamp and tuck party at the end of September. Don't know what "stamp and tuck" means? Every card needs to have the words "Operation Write Home" on the back and be tucked into an envelope in a specific way. I've ordered a stamp with the OWH logo that should be here in a couple days, and I made labels for any cards that a stamp won't show up on. I also ordered 1000 envelopes that should be here next week. So if you have cards to donate that don't have envelopes, we got yer back.
 These are today's fare. I made 6 of them. I know I've made gobs of cards of this same pattern. But I love it because it is quick, easy, creates nearly no waste and I think they are super cute.
I'm just checking in with progress on our OWH box. Our goal was 350 cards by the end of this month as I recall. I have over a hundred fabulous cards sitting on my desk waiting to be "stamp and tucked". I'd love to take credit for making all of them but many of them have been donated. So, thanks everyone for that.
I'd love it if you'd post how many you have ready. And if you want to donate you can bring them to my house or Juleen's house (don't you love how I volunteer her for stuff like that?) and we'll get them in the box. And if you can't donate cards...I'd be happy to accept dollars toward shipping. :-)
The shipping date for these to be in Washington to be sorted and mailed overseas is early October. So I thought it might be fun to have a stamp and tuck party at the end of September. Don't know what "stamp and tuck" means? Every card needs to have the words "Operation Write Home" on the back and be tucked into an envelope in a specific way. I've ordered a stamp with the OWH logo that should be here in a couple days, and I made labels for any cards that a stamp won't show up on. I also ordered 1000 envelopes that should be here next week. So if you have cards to donate that don't have envelopes, we got yer back.
Subscribe to:
Posts (Atom)